Pillow is a powerful image processing library in Python that allows you to perform various operations on images, including writing text on them. Adding text to images can be useful for creating memes, adding captions, or generating annotated images for machine learning projects. In this article, we will explore how to write on images using Pillow in Python, along with some examples.
Installing Pillow
Before we get started, let's make sure Pillow is installed. You can install it using pip, the Python package installer, by running the following command:
pip install pillowOnce Pillow is installed, we can proceed with writing text on images.
Basic Example
Let's start with a basic example of writing text on an image. We'll create a new image with a white background and then add a text caption to it.
from PIL import Image, ImageDraw, ImageFont

# Create a new image with white background
width, height = 500, 300
image = Image.new("RGB", (width, height), "white")

# Create a drawing object
draw = ImageDraw.Draw(image)

# Define the text to be written
text = "Hello World from Pillow!"

# Font with size 25
font = ImageFont.truetype('arial.ttf', 25)

# Write the text on the image
draw.text((100, 100), text, fill="black", font=font)

# Save the image
image.save("output.jpg")
In this example, we first create a new image using the Image.new() function. We specify the size of the image (500x300 pixels) and the background color ("white" in this case). Next, we create a drawing object using ImageDraw.Draw(image). This object allows us to perform various drawing operations on the image.
We define the text we want to write and the font and size using ImageFont.truetype(). In this example, we use the Arial font with a size of 40. Finally, we use the draw.text() method to write the text on the image. We provide the position (x, y), the text itself with (100, 100) coordinates, the font, and the fill color ("black" in this case).
After writing the text, we save the image using the save() method.

Options
In Pillow, we can add any font by filepath and write text accordingly. You can download any font online like from Google Fonts and add reference to font file and write text. We can also calculate text size and position accordingly. In next example, we chane font family and also align text in center of image by calculating text size. In this example, we also open an image file instead of creating an image.
from PIL import Image, ImageDraw, ImageFont

# Create a new image with white background

image = Image.open("media/test.jpg")
width, height = image.width, image.height
# Create a drawing object
draw = ImageDraw.Draw(image)

# Define the text to be written
text = "A brown box sits on the table"

# font
font = ImageFont.truetype('fonts/Roboto-Regular.ttf', 50)

# Calculate the position to center the text
text_width, text_height = draw.textsize(text, font)
x = (width - text_width) // 2
y = (height - text_height) // 2

# Write the text on the image
draw.text((x, y), text, font=font, fill=(0, 255, 255))

# Save the image
image.save("output.jpg")
Advanced Example
Now let's explore a more advanced example where we write multiple lines of text on an image with different font styles and colors.
from PIL import Image, ImageDraw, ImageFont

# Load the image
image = Image.open("media/test.jpg")

# Create a drawing object
draw = ImageDraw.Draw(image)

# Define the text to be written
text = """Lorem ipsum dolor sit amet,
consectetur adipiscing elit,
sed do eiusmod tempor incididunt"""

# Define the fonts and sizes
font_title = ImageFont.truetype("arial.ttf", 50)
font_text = ImageFont.truetype("arial.ttf", 30)

# Define the colors
color_title = "red"
color_text = (0, 255, 255)

# Define the starting position
x = 50
y = 50

# Write the title on the image
draw.text((x, y), "Title:", font=font_title, fill=color_title)

# Update the position
y += 60

# Write the text on the image
draw.text((x, y), text, font=font_text, fill=color_text)

image.save("output.jpg")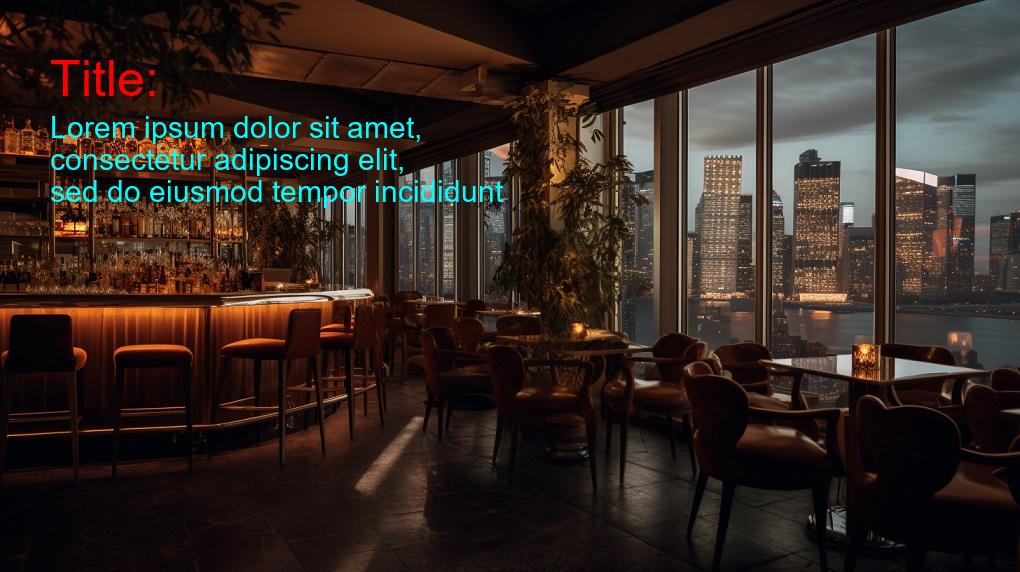
In this advanced example, we start by loading an existing image using the Image.open() function. You can replace "test.jpg" with the path to your desired image.We then create a drawing object and define the text we want to write. In this case, we have a multi-line text with line breaks. Next, we define two different fonts and sizes: font_title for the title and font_text for the content. Feel free to replace the font file ("arial.ttf") with the path to your preferred font.
Finally, we write the multi-line text on the image using `draw.text()` again, providing the updated position, the text, the content font, and the content color. To save the modified image, we use the save() method.
In this article, we explored how to write on images using Pillow in Python. We covered both basic and advanced examples, demonstrating how to add text captions with different font styles, sizes, and colors. Pillow provides a versatile set of tools for image manipulation and allows you to unleash your creativity by writing text on images for various purposes.
Comments (0)