Azure Cognitive services are used widely to achieve solutions for different problems. Azure Cognitvie Services provides Machine learnign and deep learning solutions for problems. They are easy to use and provides fast and better results.
Getting Started
Azure faces services are used to detect face in image. It performs other different operations like facial landmarks detection such as eyes, lips, nose. These features are then used to match different faces in images.
To use this service an API key is required. We can obtain API key from azure by creating a azure congnitive face service and it will provide an endpoint and api key. To get started, you need to create an azure account, after creation go to https://portal.azure.com and search for cognitive services in azure marketplace.

As, we can see a list of cognitive services in marketplace, we select azure face services and click on create to create an azure service. After that we need to create/select an resource group and then we can create an azure service.
Azure face service provides two pricing tier depending on number of requests we will be sending to that specific service.
- Free F0: (20 Calls Per Minute, 30K Calls Per Month)
- Standard S0: (10 Calls Per Second) (1$ Per 1000 transactions)
For more details about azure face cognitive service pricing, you can visit https://azure.microsoft.com/en-us/pricing/details/cognitive-services/face-api/.
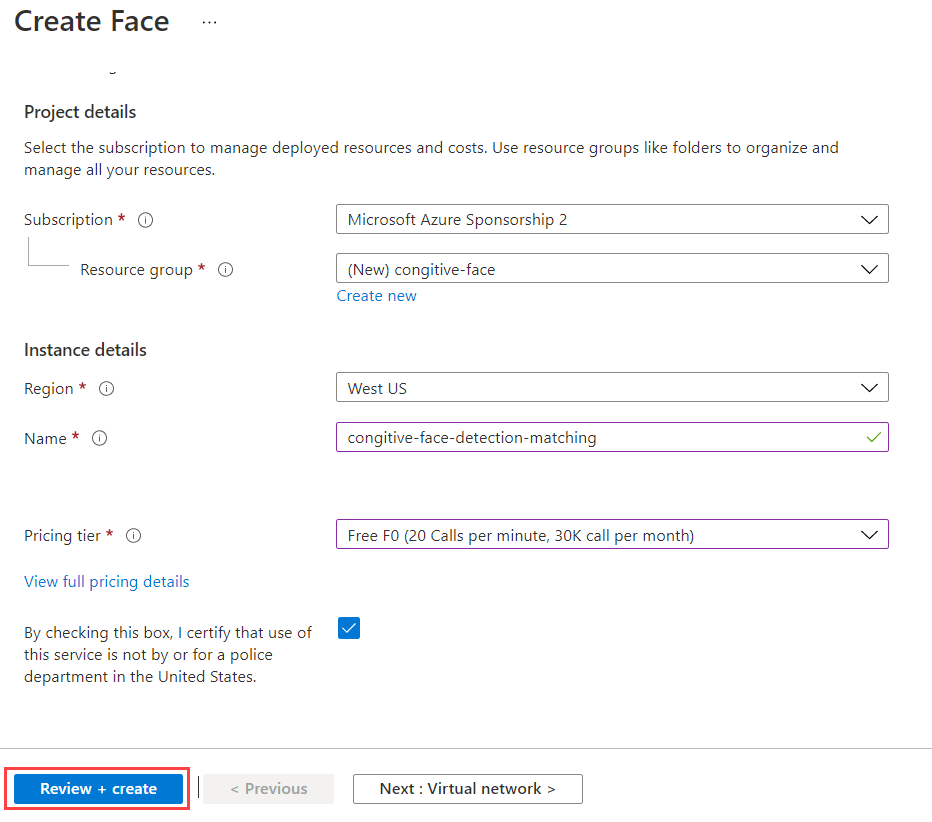
Once we have selected our resource group, region, name and pricing tier, we can create cognitive service. After creation we can navigate to our service and click on Keys and Endpoint under Resource Management Section and we can retrive our keys and endpoint details.
After obtaining the API key we can write a script to pass an image and get different insights from that image. Here is complete python code for this purpose.
Azure has provided Cognitive Face to easily perform operations related to faces. We will use this to perform different operations. First install cognitive face package from pip using…
pip install cognitive_faceNow we need to setup our subscription key and base url. These details can be aquired from azure portal in cognitive services service.
import cognitive_face as CF

KEY = 'your_subscription_key'  # Replace with a valid Subscription Key here.
CF.Key.set(KEY)

BASE_URL = 'https://westus.api.cognitive.microsoft.com/face/v1.0/'  # Replace with your regional Base URL
CF.BaseUrl.set(BASE_URL)
Face Detection
Once we have setup subscription key and base url, we can process our image and detect faces in images.
img_path = 'images/markzuckerber.jpg'
result = CF.face.detect(img_url)
For this it will return a face id and corrdinates list for all face detections which can be used for extracting face from image.
[{'faceId': '49716e7d-dfe6-4737-892b-de206a5cb448', 'faceRectangle': {'top': 200, 'left': 329, 'width': 177, 'height': 177}}]Azure store results for 24 hours which we can extract using faceId. We can read image using opencv and draw rectangle using faceRectangle points.
import cv2
img = cv2.imread(img_path) # read image using opencv
faceRect = result[0]["faceRectangle"] # get only first face from detection
_ = cv2.rectangle(img, (faceRect["left"], faceRect["top"]),
        (faceRect["left"] + faceRect["width"], faceRect["top"] + faceRect["height"]), (255,255,0), 2)
Face Matching
We can also use detected faces to match and check if any faces are identical. For each face detection, azure congnitive service return a faceId, we can use this faceId to verify faces. For face varification, it requires two faceIds and return with probability if they are identical of not. It also returns matching score for verification, which then can be used as threshold for further checking. For matching, first we need faceIds for two faces, which we can get by detect method used above.
# Get first image detection results
img_1_path = 'markzuckerberg.jpg'
result_1 = CF.face.detect(img_path)

# Get second image detections result
image_2 = "mark2.jpg"
result_2 = CF.face.detect(image_2)
Now we have results for both images where each image contain only 1 face of person. Now we call CF.face.verify to get similarity results.
similarity = CF.face.verify(result_1[0]['faceId'], result_2[0]['faceId'])
print(similarity)
It returns output like this.
{'isIdentical': True, 'confidence': 0.73589}