Wordcloud is the graphical representation of text data which shows more frequent words with large text size and words with less frequency have small text size in a text corpus. It helps to understand the basic idea about given text that what is this about or for some other Machine learning or Deep Learning tasks for Natural Language Processing. There are different online tools and libraries available to feed a text input and create a wordcloud for that given text.
In python, we can use an open source library WordCloud for creating wordclouds from text input. It offers different features and methods to eliminate common words, change output graph representations and much more. For getting started in python, we first need to install this library using pip or from source.
pip install wordcloudAfter installation, we can use it as both command line using python to create wordclouds. Basic example requires a text file input path and output image path.
Using CLI
Using CLI is very simple and produces output with just one line.
# data.txt is input file and word.png is output file path
wordcloud_cli --text data.txt --imagefile word.pngwordcloud_cli --text data.txt --imagefile word.png --width 700 --height 550By default, it will create an image of 400x200 pixels, we can modify width and height by providing width and height arguments.
It produces an image of desired size and store on given path. For this example input, output could be as follows.
 To view list of all arguments,we can use
 wordcloud_cli --help to get all optional arguments, which by specifiyng we can change behaviour of output. For example, we can limit top number of words to show say top 100 words only by argument --max_words or we can also specify which words to ignore by providing a file of words which we want to ignore. We will discuss all these feature in python code because we can use it both ways. For more details on command line options visit wordcloud official website.
http://amueller.github.io/word_cloud/cli.html
Using Python
Using wordcloud library with python is also very simple. In python we can easily process multiple data and also can preprocess before input to wordcloud. First, we will create a basic example using wordcloud and reading text data from a file.
from wordcloud import WordCloud
import matplotlib.pyplot as plt

# read text from file and store in a variable
with open("E:/data.txt") as file:
    data = file.read()

# create wordcloud using data
wordcloud = WordCloud().generate(data)

# show wordcloud using matplotlib
plt.imshow(wordcloud, interpolation="bilinear")
plt.axis("off")
plt.show()
It produces image save as above that we created using cli and show it using matplotlib. We can show wordcloud using other libraries like opencv, pillow and also other formats like html, csv etc.
Now, we provide arguments of max words and stop words list to limit number of top words and exclude words. WordCloud also has a set of predefined STOPWORDS which we can either override or can add new words to it that we dont need. To get a set of predefined stop words we can get using this code.
from wordcloud import STOPWORDS
print(STOPWORDS) # a set of words
Now, we add some words to this set of words for demonstration and view output.
STOPWORDS.update({"machine", "system"}) # add two words

# we specify new stopwords, max words as 60, width and height
wordcloud = WordCloud(
        stopwords=STOPWORDS, max_words=60, width=500, height=350
    ).generate(data)
Now, as we can see in output that it has excluded given words ans is showing only top 60 words.

We can also provide background color to change background color of output image, minimum and maximum font size and custom font also. All list of paramters accepted by wordcloud functions can be check at its documentation. Lets create another wordcloud width different background color, word size and scale.
wc = WordCloud(
    background_color="white", height=300, width=500,
    include_numbers = True, min_word_length=6, # minimum length of word
    max_words = 50, margin = 8 # margin between words
).generate(data)
The above example creates a wordcloud with background color as white and will show only words which have length of 6 or more.
We can also specify a background mask to show word on only specific area of image. This way we can create very good wordcloud in any shape that we want. For this part, you will need a library to read image and provide an input mask as numpy array to wordcloud. We will be using Pillow to read images and convert to numpy array for input.
from PIL import Image
import numpy as np
# read image and convert to numpy array
be_mask = np.array(Image.open("ab_bin.png"))
h, w = be_mask.shape
# Create wordcloud
wc = WordCloud(background_color="white", mask=be_mask, height=h, width=w,
               contour_width=1, contour_color='steelblue'
).generate(data)

# show output
plt.imshow(wc, interpolation='bilinear')
plt.axis("off")
plt.figure()
plt.imshow(be_mask, cmap=plt.cm.gray, interpolation='bilinear')
plt.axis("off")
plt.show()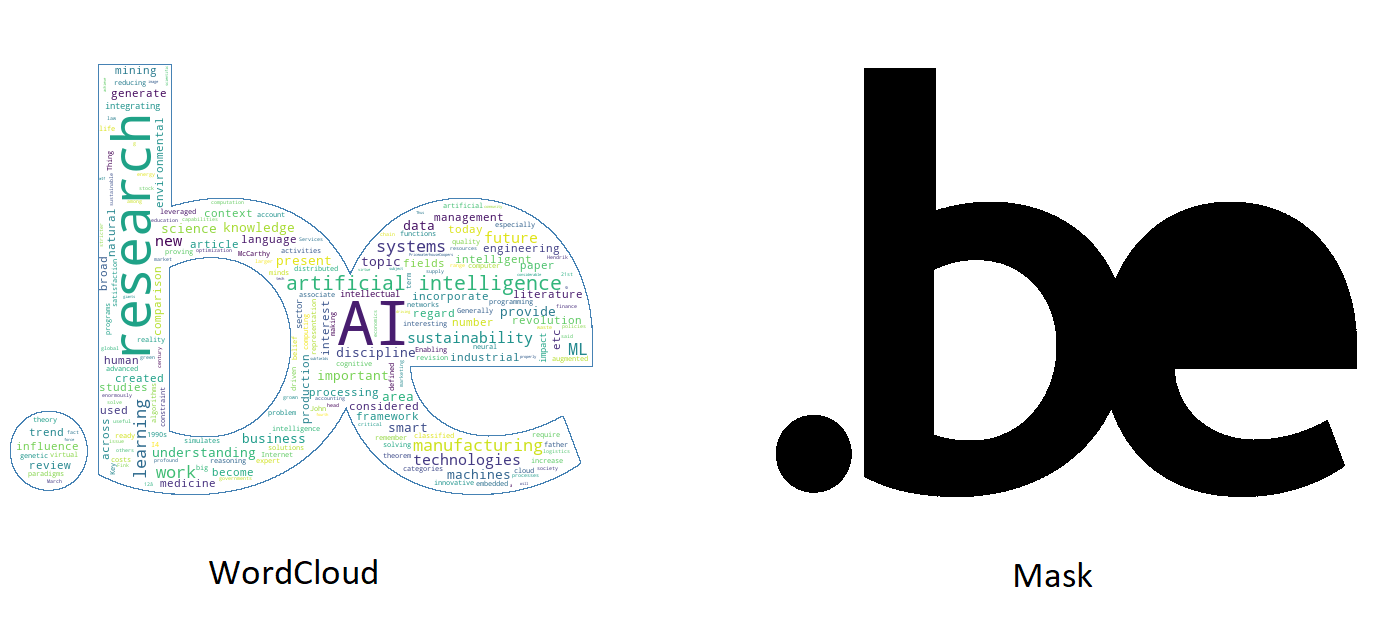
This way we can provide custom input masks both color and binary to get desired output. Wordcloud has many other different options to modify the behaviour of output masks which can be viewed at its official documentation.
For more details visit github code repository or its official website.