Mediapipe is open-source cloud platform from google offering different Deep Learning models for Computer Vision for different devices. In this tutorial, we will use mediapipe to get landmarks for person and plot on image. We will also get segmentation results and extract person using mediapipe tools. Install mediapipe using pip in command prompt/shell.
pip install mediapipeAfter installation, we will use mediapipe models for pose estimation. Here is the list of points it returns from an image.
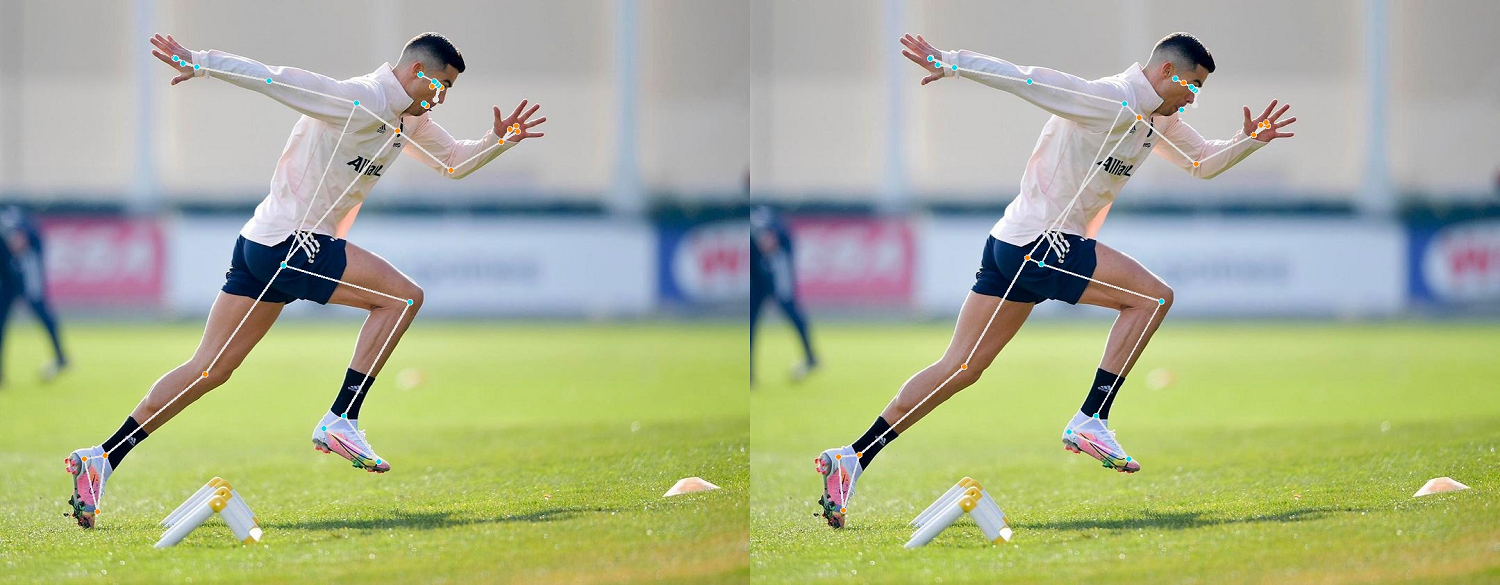
Mediapipe offers 3 different models by complaxity where higher model takes more time to process image and also provide more accurate results. Mediapipe also provide very good segmentation results for a person image. So, lets try mediapipe and compare results for different options.
We will use opencv python to read images and input to mediapipe and write back to storage.
import cv2
import mediapipe as mp
Now we need to initialize a mediapipe pose estimation model and we will also use mediapipe drawing utils to easily draw points on image. Here we provide different options while creating a pose model object.
static_image_modeIf we have only single image input, we set it to false. If there is a video input, we can set it to true so that it will try to track from previous frames and will increase performance.model_complexityCould be either 0, 1 or 2 where 2 is higher modelenable_segmentationIf set to true, it will also predict mask for given imagemin_detection_confidenceDetection results confidence, could be adjusted according to requirements and input image
First, we try with larger model and no segmentation output.
# utils for drawing on image
mp_drawing = mp.solutions.drawing_utils
mp_drawing_styles = mp.solutions.drawing_styles

# mediapipe pose model
mp_pose = mp.solutions.pose.Pose(
        static_image_mode=False,
        model_complexity=2,
        enable_segmentation=False,
        min_detection_confidence=0.5)
Now we read an image from directory using opencv and provide as input to mediapipe. Opencv reads image as BGR so we convert image to RGB format before input to model.
image = cv2.imread("ronaldo.jpg")
#convert image to RGB (just for input to model)
image_input = cv2.cvtColor(image, cv2.COLOR_BGR2RGB)

# get results using mediapipe
results = pose.process(image_input)
Now, we can check if there are any results and draw results using mediapipe drawing utils.
if not results.pose_landmarks:
    print("no results found")
else:
    mp_drawing.draw_landmarks(
        image,
        results.pose_landmarks,
        mp_pose.POSE_CONNECTIONS,
        landmark_drawing_spec=mp_drawing_styles.get_default_pose_landmarks_style())

# write image to storage
cv2.imwrite("./ronaldo-processed.jpg", image)
It draws landmarks on image and write back to storage.
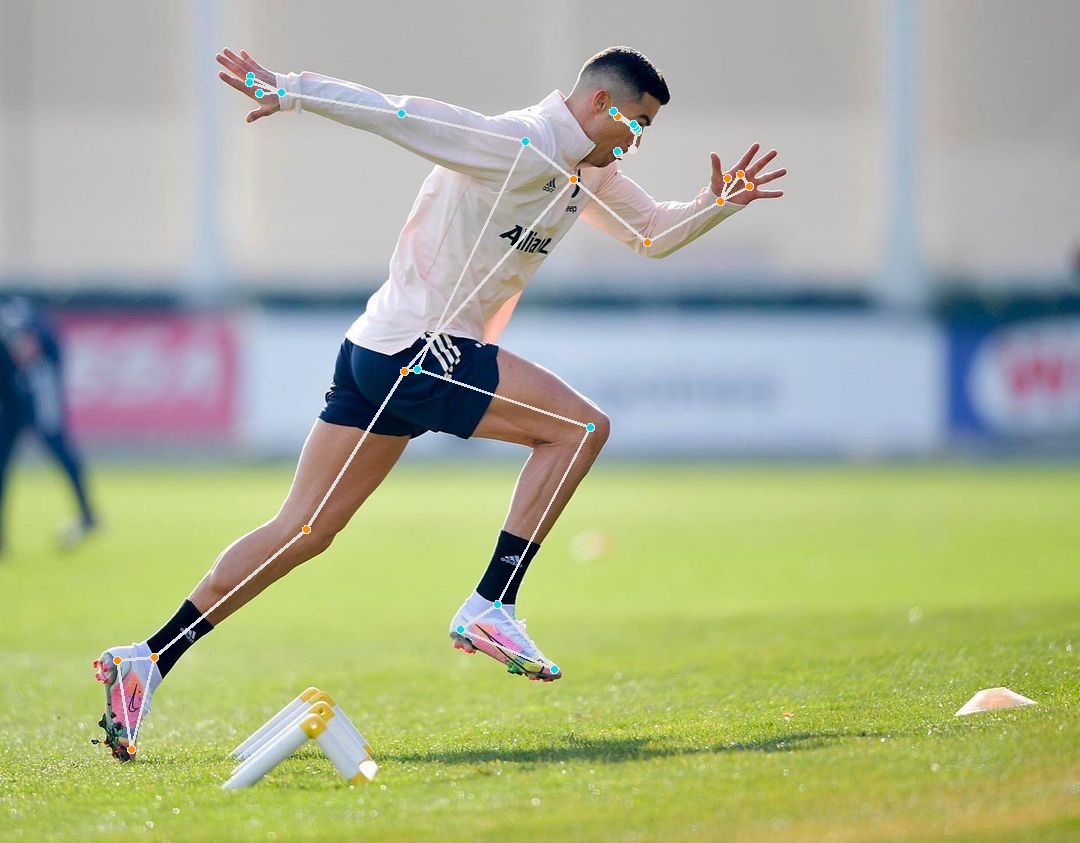
Now we can use different models for comparison and how they provide different results. Here is a comparison of other two models (0 and 1) respectively.
We cal also enable segmentation by changing segmentation to true.
Pose Segmentation
Initialize model with segmentation to true and we again get results from model.
pose = mp_pose.Pose(
        static_image_mode=False,
        model_complexity=2,
        enable_segmentation=True,
        min_detection_confidence=0.5)
# get both mask and landmarks for input image
results = pose.process(image_input)
Now we can use numpy to apply segmentation mask on image.
import numpy as np

BG_COLOR = (192, 192, 192) # gray

# apply mask on image with gray
condition = np.stack((results.segmentation_mask,) * 3, axis=-1) > 0.1
bg_image = np.zeros(image.shape, dtype=np.uint8)
bg_image[:] = BG_COLOR
image = np.where(condition, image, bg_image)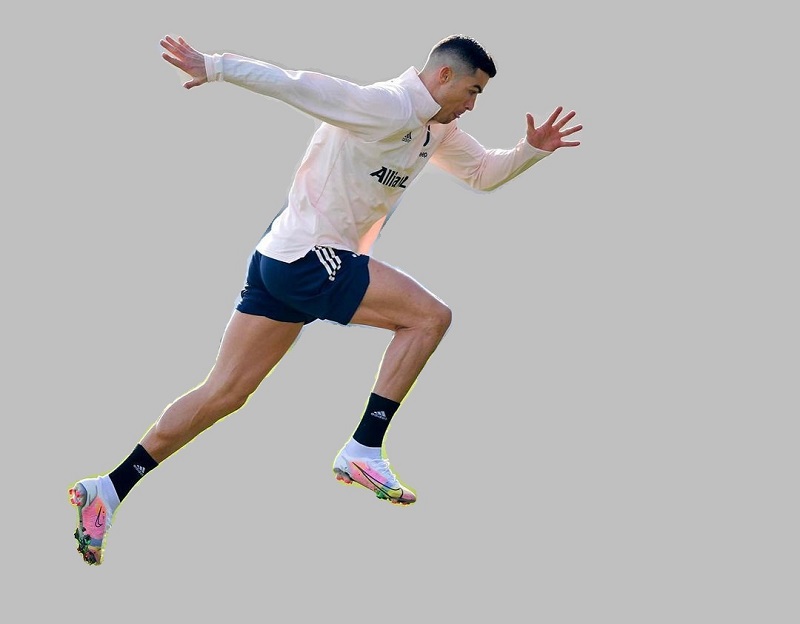
Now, if you also want to draw landmarks on image, you can use previous code to draw landmarks on this image.
For videos, this works same as defined, we just change static image mode to false for better performance. For more details on this, check mediapipe official documentation.