Python-docx provides a lot of features for creating and modifying word documents. In this tutorial, we will implement table feature and use table rows and columns to add data to tables. For API documentation of tables in python-docx, check documentation on this url.
https://python-docx.readthedocs.io/en/latest/api/table.html
Tables are constructed using add_table() method in python-docx document. We can provide following options while creating a table.
- rows: Number of rows for table
- cols: Number of columns for table
- style: (default
None) Specify a style, style may be a paragraph style object or paragraph style name.
For complete list of table styles, view on python-docx.
Create Table
Lets Create a table with 2 rows and 2 colums using add_table method. Table style can be defined using style argument which in this case is Table Grid.
from docx import Document
# create document
doc = Document()

# add grid table
table = doc.add_table(rows=2, cols=2, style="Table Grid")
Now table rows and columns can be accessed using table.rows or table.columns attribute respectively and then we can access each cell in that row using row.cells. Lets add headings to 1st row.
# access first row's cells
heading_row = table.rows[0].cells

# add headings
heading_row[0].text = "Name"
heading_row[1].text = "Marks"
Same way we can add other info to rows
# access second row's cells
data_row = table.rows[1].cells

# add headings
data_row[0].text = "Ali"
data_row[1].text = "68"
Add rows
We can also add rows after table creation using add_row method which adds a row in table and we can add data to that row.
# add new row to table
data_row = table.add_row().cells

# add headings
data_row[0].text = "Bilal"
data_row[1].text = "26"
It creates a table with 3 rows and 2 columns with information.

Cell Margin
We can use OpenXML to modify and set any style using python-docx. Here we can specify margin to any cell where we can add or completely remove a cell margin.
from docx.oxml.shared import OxmlElement
from docx.oxml.ns import qn

def set_cell_margins(cell, **kwargs):
    """
    cell:  actual cell instance you want to modify
    usage:
        set_cell_margins(cell, top=50, start=50, bottom=50, end=50)

    provided values are in twentieths of a point (1/1440 of an inch).
    read more here: http://officeopenxml.com/WPtableCellMargins.php
    """
    tc = cell._tc
    tcPr = tc.get_or_add_tcPr()
    tcMar = OxmlElement('w:tcMar')

    for m in ["top", "start", "bottom", "end"]:
        if m in kwargs:
            node = OxmlElement("w:{}".format(m))
            node.set(qn('w:w'), str(kwargs.get(m)))
            node.set(qn('w:type'), 'dxa')
            tcMar.append(node)

    tcPr.append(tcMar)
From Stackoverflow: https://stackoverflow.com/a/55177526/6663675
Now we can add margin in any cell to increase space.
# access second row's cells
data_row = table.add_row().cells

set_cell_margins(data_row[0], top=100, start=100, bottom=100, end=50)

# add headings
data_row[0].text = "Usman"
data_row[1].text = "76"
Nested Table
We can also created nested tables where we can add a table to a cell. For example, if for 1 person, we want to add marks for multiple subjects. We can add a table to parent table cells.
marks = {"English" : 78, "Physics" : 98, "Chemistry" : 78}

# add new row
data_row = table.add_row().cells

# name of person
data_row[0].text = "Nasir"
# We add a table to 2nd cell with rows equal to our entries (3)
marks_table = data_row[1].add_table(rows=len(marks), cols=2)
Now we can iterate over values and add to table.
for i, row in enumerate(marks.items()): # iterate over 3 values
    marks_table.rows[i].cells[0].text = row[0] # sub table first cell
    marks_table.rows[i].cells[1].text = str(row[1]) # second cell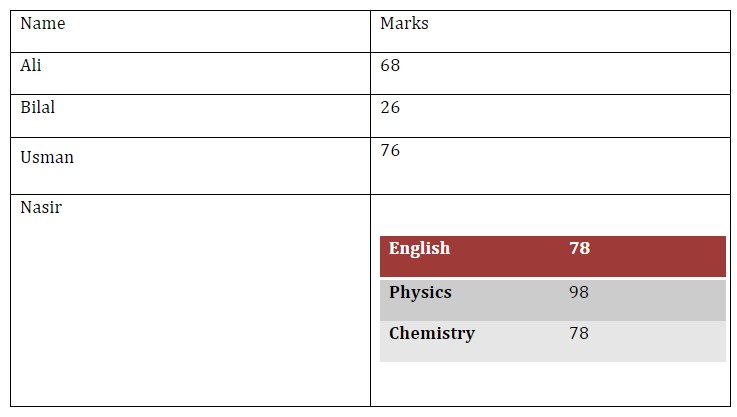
We can also show images inside tables.
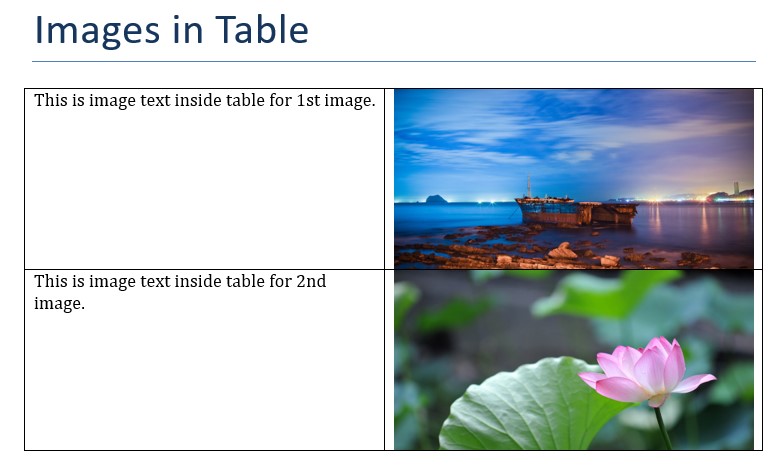
Table Images
In table paragraphs, we can add images to table. Here is a simple example to add two images to table. Here we get paragraph for a cell where we want to display image and then use add_picture method to add an image from path. and we also specify height and width in Inches.
from docx.shared import Inches, Cm

doc = Document() # create doc
doc.add_heading('Images in Table', 0) # add heading

# create table with two rows and columns
table = doc.add_table(rows=2, cols=2, style="Table Grid")

# add first image with text
table.rows[0].cells[0].text = 'This is image text inside table for 1st image.'

# add image to table
paragraph = table.rows[0].cells[1].paragraphs[0]
run = paragraph.add_run()
run.add_picture('image-1.jpg', width=Inches(3), height=Inches(1.5))


table.rows[1].cells[0].text = 'This is image text inside table for 2nd image.'

# add image to table
paragraph = table.rows[1].cells[1].paragraphs[0]
run = paragraph.add_run()
run.add_picture('image-2.jpg', width=Inches(3), height=Inches(1.5))

# save to file
doc.save("images-table.docx")
So it creates a table with text in 1st column and images in 2nd column for each row.
 For more info to working with images, view my next post or view python-docx documentation.
View can add data from csv file, text file or any other file to tables in docx. So for more info view python docx documentation.
https://python-docx.readthedocs.io/en/latest/api/table.html