Transformers are trained on wide range of Deep Learning problems for Computer Vision, Natural Language Processing and different other problems. In this tutorial, we will use pretrained Image Segmentation model Segformer. Segformer is a simple and efficient design for Semantic Segmentation with Transformers.
SegFormer consists of a hierarchical Transformer encoder, and a lightweight all-MLP decoder head. Segformer models come in different sizes and have different accuracy according to size.
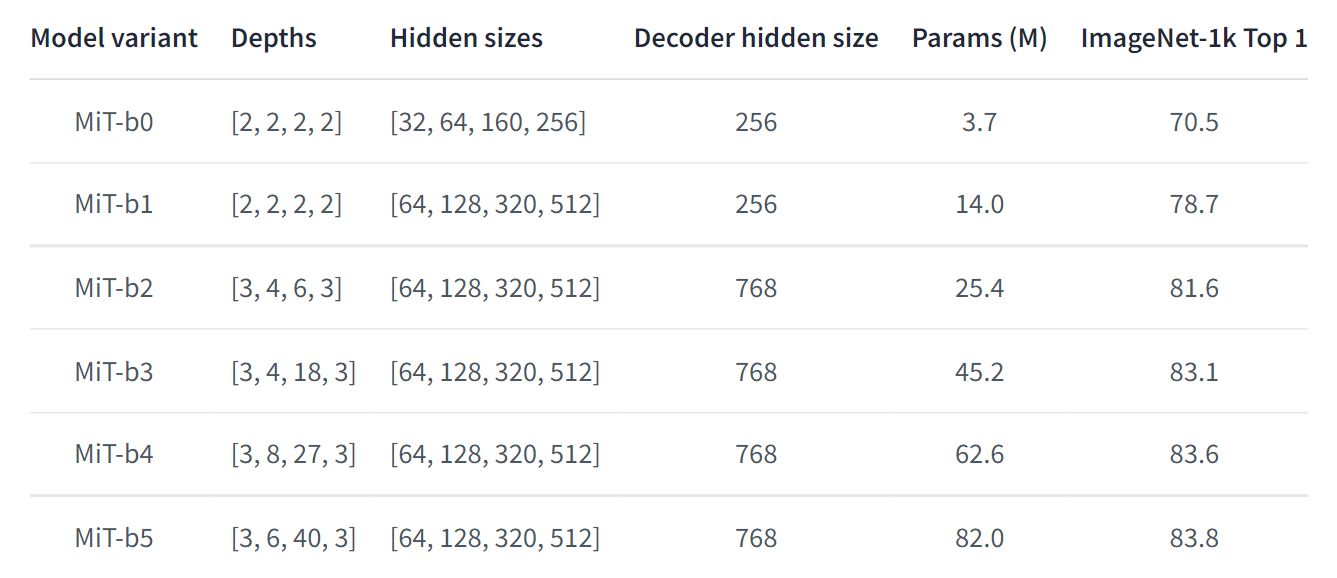
For getting started, we need to install required packages. This model requires pytorch and transformers packages. After installing packages, we first load Featurer extractor and segmentation models. It will fetch model from Segformer repository on huggingface if not available locally. You can specify any model from list of models given above with specific shape.
from transformers import SegformerFeatureExtractor, SegformerForSemanticSegmentation
from PIL import Image
import requests
# Load feature extractor and Semantic Segmentation model
feature_extractor = SegformerFeatureExtractor.from_pretrained("nvidia/segformer-b5-finetuned-cityscapes-1024-1024")
model = SegformerForSemanticSegmentation.from_pretrained("nvidia/segformer-b5-finetuned-cityscapes-1024-1024")
Now, we read a image and pass to Segformer for feature extraction and inference. Read image from local path or url with Pillow and requests in python.
url = "http://images.cocodataset.org/val2017/000000039769.jpg"
image = Image.open(requests.get(url, stream=True).raw)

# Or read from local path
image = Image.open("images/text1.png")
Once we read image, we can pass to feature extractor and then model for output.
inputs = feature_extractor(images=image, return_tensors="pt") # feature extractor
outputs = model(**inputs) # semantic segmentation
logits = outputs.logits.cpu()
Now, we need to rescale logits to original image size and then we can create a mask and overlay on main image.
from torch import nn

upsampled_logits = nn.functional.interpolate(logits,
                size=(image.size[1], image.size[0]), # (height, width)
                mode='bilinear',
                align_corners=False)

predicted_mask = upsampled_logits.argmax(dim=1).cpu().numpy()
Now we need to process predicted mask with color palette. Color palette and classes names for each dataset are given on official Segformer repository on Github. Please check it here for cityscapes dataset.
https://github.com/NVlabs/SegFormer/blob/master/mmseg/datasets/cityscapes.py
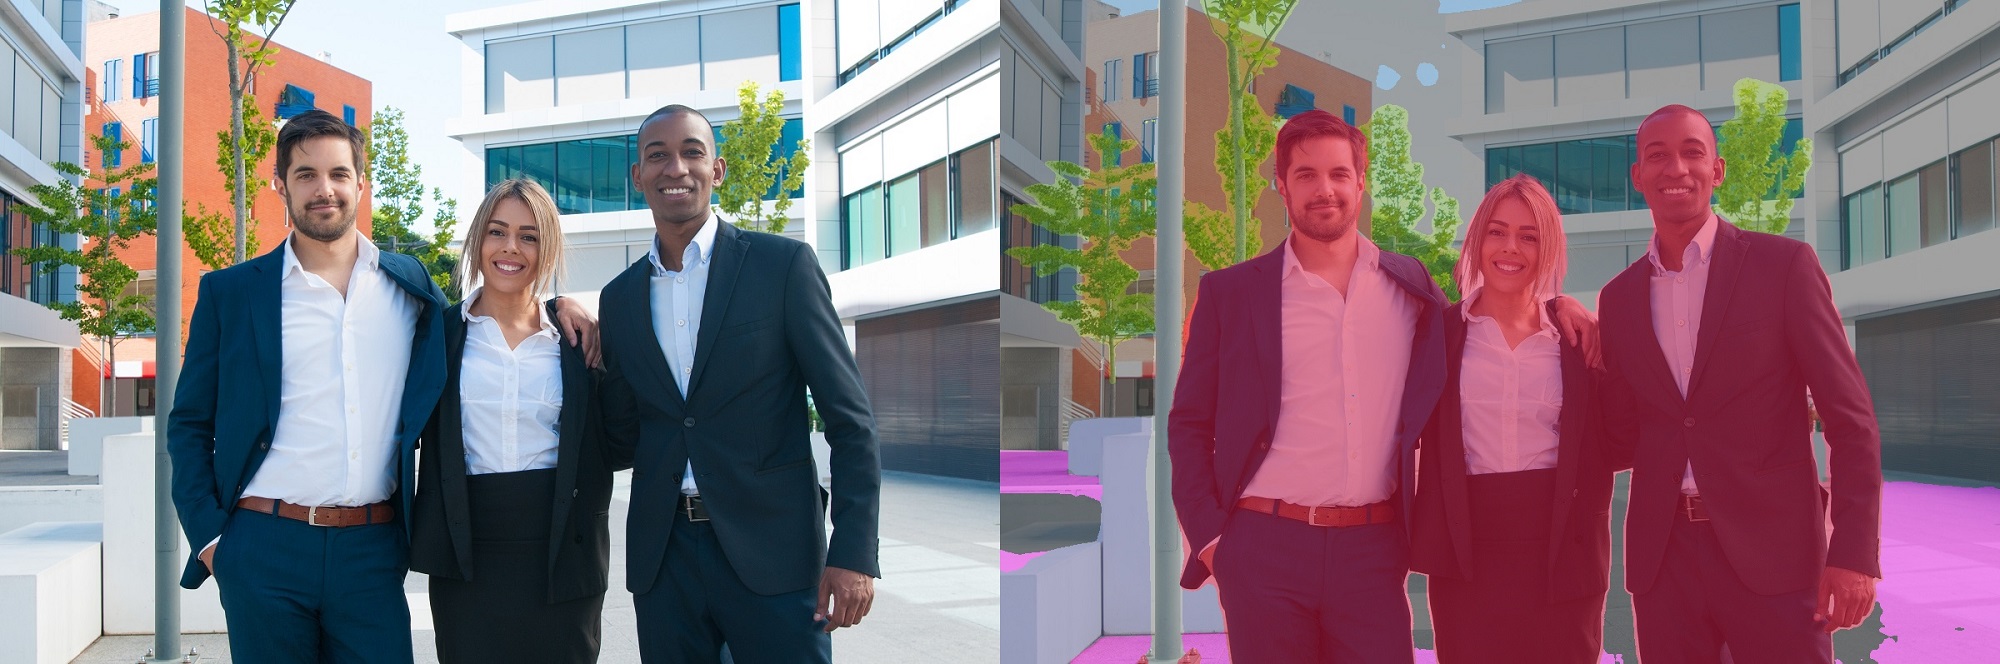
We load color palette and get predicted mask and to create final output.
# Color palette from cityscape dataset on Segformer repository
PALETTE = [[128, 64, 128], [244, 35, 232], [70, 70, 70], [102, 102, 156],
            [190, 153, 153], [153, 153, 153], [250, 170, 30], [220, 220, 0],
            [107, 142, 35], [152, 251, 152], [70, 130, 180], [220, 20, 60],
            [255, 0, 0], [0, 0, 142], [0, 0, 70], [0, 60, 100], [0, 80, 100], [0, 0, 230], [119, 11, 32]]
color_map = {i : k for i, k in enumerate(PALETTE)}

# Overlay colormap on mask

vis = np.zeros(prediction.shape + (3,))
for i,c in color_map.items():
  vis[prediction == i] = color_map[i]

mask = Image.fromarray(vis.astype(np.uint8)) # covert to pillow image.
mask = mask.resize(image.size) # resize to original image size

overlayed_img = Image.blend(image.convert("RGBA"), mask.convert("RGBA"), 0.5)

# save mask and overlayed image
mask.save("out.png")
overlayed_img.save("out.jpg")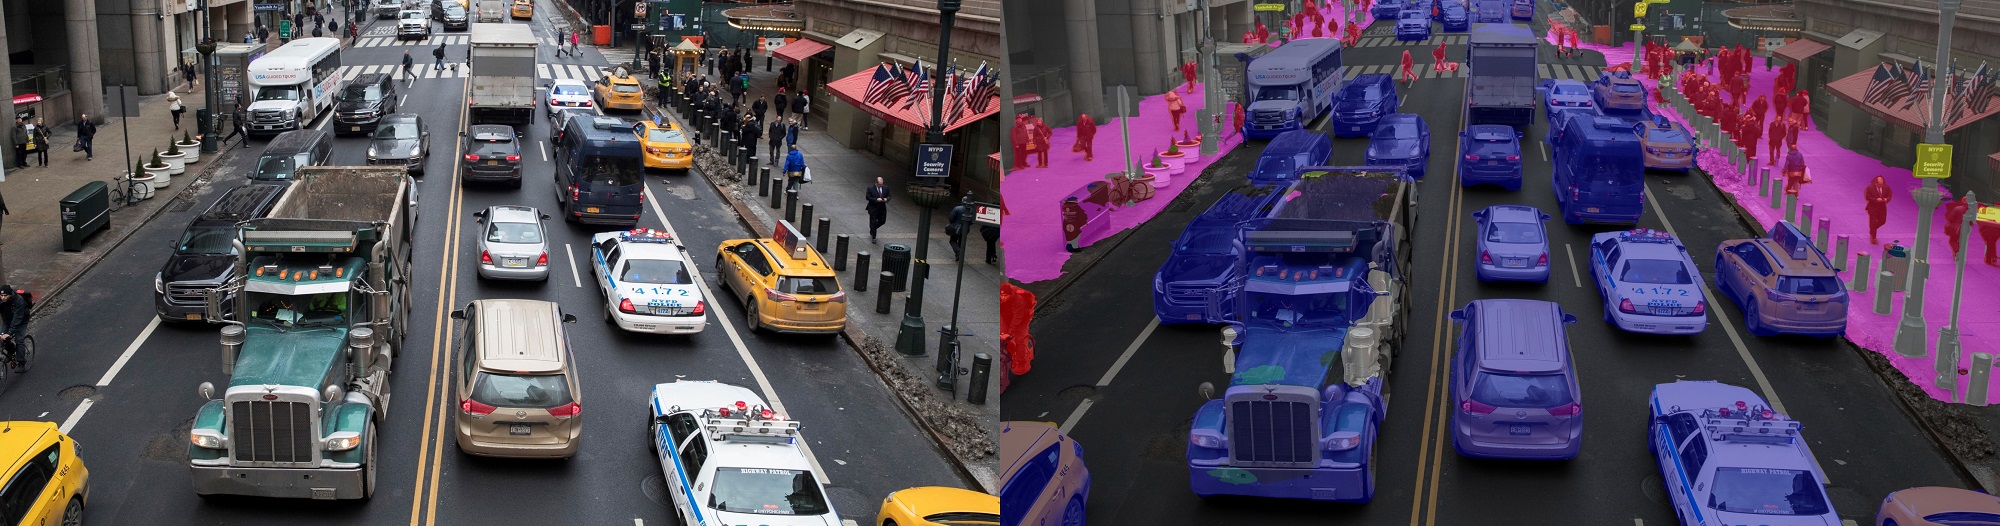
For more info on models and updates, view official Nvidia Segformer page on huggingface or Github.
https://huggingface.co/nvidia/segformer-b5-finetuned-cityscapes-1024-1024